Wednesday, October 31, 2012

Download Slide Unlock Application nUnlock for Nokia 5800, N97, X6 and N8

 မူရင္းပို႕စ္ http://nokia5800downloads.blogspot.com/2011/07/download-slide-unlock-application.html
nUnlock is a very useful slide unlock application for Symbian^3 and Symbian S60 5th edition phones. The application provides following exciting features:

  • Slide to unlock your phone
  • Preview the date and time on locked screen
  • Set background image of your choice

  • Set the transparency
  • Customize the text displays to unlock the phone.
  • Show/hide the information to be displayed on locked screen
  • Enable/disable Unlock beep

nUnlock is a perfect slide unlock app as it offers you so many features. The application works great on mobiles such as Nokia 5800 XpressMusic, N97, N97 Mini, X6, 5228, 5230, 5233, 5235, 5530 XpressMusic, N8, E7 and C7.


The application is developed by ThinkChange. The version 5.20.0 of this application can be downloaded from the following link.

Application nUnlock for Nokia 5800 XpressMusic and N97 (235 KB)
Related Posts:

Download Application MazeLock v2.10 for Nokia 5800, N97, X6, 5530 and N8

A newer version 2.10 of ThinkChange MazeLock application is available to try on your Symbian^3 and Symbian S60 v5 touch screen mobiles. MazeLock is a phone unlock application similar to what is available in Google's Android mobile OS.


MazeLock appliation offers a very innovative way to unlock your touch screen mobile. In order to use the unlocking you first need to set your own unlock pattern by connecting some of the nine white dots together (Initially there is a default unlock pattern set in the mobile). When you try to unlock your phone, you need to draw the same pattern exactly as you set.


You can perform customization on the default settings. You can set your background, Font color, Line Color, Time Format and Date Format to be displayed on unlock screen. The application is developed by ThinkChange.


MazeLock application works with Nokia 5800 XpressMusic, 5530 XpressMusic, 5228, 5230, 5233, 5235, N97, N97 Mini and X6. The version 2.10.0 of this application is available to download from the following link.

Application MazeLock v2.10 for Nokia 5800 XpressMusic and N97 (462 KB)

Tuesday, October 30, 2012

(Android only) Zapya data share with wifi

(Android only) Zapya data share with wifi
Androidဖုန္းေတြမွာdata ေတြfileေတြshareဖို႔က်ေနာ္တို႔ေတြbluetoothသံုးၾကတယ္

အခုေတာ့bluetoothထက္အဆေပါင္းမ်ားစြာၿမန္တဲ့wifiနဲ႔shareၾကမယ္ဗ်

စသံုးစဆိုရင္နဲနဲရႈပ္ေနပါလိမ့္မယ္ဒီေကာင္ေလးကိုသံုးခ်င္ရင္ဖုန္းႏွစ္လံုးစလံုးမွာwifiရွိမွရပါမယ္

ပထမဦးဆံုးဒီေကာင္ေလးကိုေဒါင္းလိုက္ပါ https://www.dropbox.com/s/d5lkxdq855s0f5p/Zapya-51.apk
ဒါေတာ့ေနာက္ဆံုးထြက္ version ပါ http://www.mediafire.com/?s114lx6jjb65cad


ၿပီးရင္install လုပ္လိုက္ပါ၀င္လိုက္ရင္ဒါမ်ဳိးေလးေပၚလာပါလိမ့္မယ္


ၿပးီရင္အဆင့္ဆင့္သြားလိုက္ပါေနာက္ဆံုးအဆင့္ေရာက္ရင္barေလးကိုႏွိပ္ေပးလိုက္ပါ

ၿပီးရင္ok

avatar and nickname ထည့္ၿပီးရင္ Done
အဲဒါၿပီးရင္လဲအဆင့္ဆင့္ဆက္သြားလိုက္ပါၿပီးရင္start(software upgradeလုပ္မလားေမးလာရင္ေဘာ္ဒါတို႔သေဘာ)
ၿပီးရင္ေအာက္ကပံုထင္ကအတိုင္း connect to friend ကိုႏွိပ္ပါ


ထို႔ေနာက္ဒီတိုင္းေပၚလာပါမယ္


ဒါမ်ဳိးေပၚလာၿပီဆိုရင္တစ္ေယာက္က create network လုပ္ပါေနာက္တစ္ေယာက္က search network လုပ္ပါ

search တဲ့သူက create လုပ္ထားတဲ့ network ကိုေတြ႔ရင္connect လုပ္ေပးလိုက္ပါ

connectၿဖစ္သြားၿပီဆိုရင္ကိုယ္shareေပးခ်င္တဲ့appၿဖစ္ၿဖစ္data file ၿဖစ္ၿဖစ္ပံုထဲကavatar qq (eg) အကြက္ေလးထဲကိုဖိၿပီးတြန္းပို႔ေပးလိုက္ပါစကၠန္႔ပိုင္းနဲ႔ကိုေရာက္သြားမွာပါ


အားလံုးအဆင္ေၿပပါေစဗ်ာဒီေကာင္ေလးရဲ႕အားသာခ်က္ကgameေတြappေတြကိုapk file မရွိလည္းshareေပးလိုက္ရင္တစ္ဖက္လူကapk file ေလးကိုရရွိမွာပါ file size ၾကီးတာေတြပို႔ရင္လည္းအရမ္းၿမန္တဲ့အတြက္bluetoothထက္အစေပါင္းမ်ားစြာေကာင္းပါတယ္ (မွတ္ခ်က္ဖုန္း2လံုးစလံုးမွာWifiရွိမွရပါမယ္)
မူရင္းပို႕စ္ https://www.facebook.com/groups/mmua.mobile/
https://www.facebook.com/devil.lucefar

ေက်းရြာမ်ားသို႔ GSM မိုဘိုင္းဖုန္း အရစ္က်ေရာင္းခ်မႈအား စိတ္၀င္စားမႈ နည္းပါးႏိုင္ဟုဆို


၂၀၁၃ ခုႏွစ္ပိုင္းအတြင္း မိုဘိုင္းဖုန္းသံုးစြဲမႈ သန္း ၃၀ အထိရွိႏိုင္ရန္အတြက္ ေက်းလက္ေဒသမ်ားသို႔ ေရာင္းခ်ႏိုင္မွသာ ျပည့္မီႏိုင္မည္ဟု ကၽြမ္းက်င္သူမ်ားမွ သံုးသပ္ခဲ့ၾကၿပီးသည့္ေနာက္ပိုင္းတြင္ ျမန္မာ့ဆက္သြယ္ေရးမွ ဂ်ီအက္စ္အမ္မိုဘိုင္းဖုန္းလိုင္းမ်ားကုိ အရစ္က်စနစ္ျဖင့္ ေရာင္းခ်ေပးႏိုင္ရန္ စတင္ေဆာင္ရြက္ခဲ့ေၾကာင္း သိရသည္။

ထိုကဲ့သို႔ GSM မိုဘိုင္းဖုန္းမ်ားကုိ အရစ္က်စနစ္ျဖင့္ စတင္ေရာင္းခ်ေပးရာတြင္ လက္ရွိအခ်ိန္၌ ေက်းလက္ေဒသမ်ားသို႔ စတင္ေရာင္းခ်ေပးလ်က္ရွိေသာ္လည္း ေက်းလက္ေနျပည္သူမ်ားမွာ မိုဘိုင္းဖုန္းေရာင္းခ်ျခင္းအား စိတ္၀င္စားမႈ နည္းပါးႏိုင္ေၾကာင္း ေစ်းကြက္ကၽြမ္းက်င္သူမ်ားမွ ထပ္မံသံုးသပ္ေျပာျပၾကသည္။ “အရစ္က် ေရာင္းခ်ေပးတဲ့ေနရာမွာ ပထမအရစ္ ေလးေသာင္းက်ပ္သြင္းရမယ္၊ ေနာက္ပိုင္းတစ္လကို တစ္ေသာင္းေပးသြင္းရမယ္ဆိုတာက ရန္ကုန္နဲ႔ ၿမိဳ႕ႀကီးေတြမွာေတာ့ လူတိုင္းေပးသြင္းႏိုင္သလို သာမန္၀န္ထမ္းအေနနဲ႔ ေပးေခ်ႏိုင္ပါလိမ့္မယ္။ ေက်းလက္ေဒသေတြက်ေတာ့ ပထမအရစ္ ေလးေသာင္းက်ပ္မွာတင္ အခက္အခဲ စၿပီးေတာ့ရွိပါတယ္။ လစဥ္ တစ္ေသာင္းက်ပ္ ထပ္မံသြင္းဖို႔ဆိုရင္ ပိုၿပီးေတာ့ခက္ခဲႏိုင္ပါတယ္” ဟု အစိုးရ၀န္ထမ္းေဟာင္းတစ္ဦးက ၎၏ထင္ျမင္ခ်က္ကို ေျပာျပသည္။ ေက်းလက္ GSM အရစ္က် ေရာင္းခ်မႈႏွင့္ ပတ္သက္၍ ေစ်းကြက္ကၽြမ္းက်င္သူတစ္ဦးက “ေက်းလက္ေဒသေတြမွာက လူတိုင္း ဖုန္းမ၀ယ္ႏိုင္ၾကပါဘူး။ ေနာက္ထပ္တစ္ခုက လူတိုင္းက ဖုန္းအသံုးျပဳဖို႔ မလိုအပ္ေနတဲ့အတြက္လည္း ပါပါတယ္။ ေနာက္ထပ္တစ္ခုက တစ္ဦးခ်င္းအလိုက္ ဖုန္းအသံုးျပဳဖို႔ထက္ တစ္အိမ္တစ္လံုးေလာက္ရွိရင္ေတာင္ ေတာ္ေတာ္ေလးလံုေလာက္ေနတဲ့ အေျခအေနျဖစ္တဲ့အတြက္ နယ္ၿမိဳ႕ကေတာ့ ၿမိဳ႕ႀကီးေတြေလာက္ ေရာင္းအားမေကာင္းႏုိင္ပါဘူး။ နယ္ၿမိဳ႕မွာဆိုရင္ တာ၀ါတိုင္နည္းပါးမႈေတြလည္းရွိေတာ့ လိုင္းအားနည္းမႈေၾကာင့္လည္း တခ်ဳိ႕မသံုးတာမ်ဳိးေတြလည္း ရွိႏိုင္ပါတယ္” ဟု ဆက္လက္ေျပာျပသည္။ မိုဘိုင္းဖုန္းဟန္းဆက္ေစ်းကြက္ရွိ ကၽြမ္းက်င္သူမ်ားမွ ေျပာျပရာတြင္လည္း “ကၽြန္ေတာ္တို႔အေနနဲ႔က မိုဘိုင္းဖုန္းလိုင္းကတ္ေတြကို ထည့္သြင္းအသံုးျပဳႏိုင္တဲ့ တန္ဖိုးနည္းဟန္းဆက္ကို အရစ္က်ေပးရပါမယ္။ နယ္ၿမိဳ႕ေတြ အသံုးျပဳမွာဆိုေတာ့ တန္ဖိုးနည္းႏွစ္ေသာင္း၊ သံုးေသာင္း၀န္းက်င္ ဟန္းဆက္ေတြကို ေရာင္းေပးဖို႔ စီစဥ္ထားပါတယ္။ အခုေလာေလာဆယ္ေတာ့ ၿမိဳ႕ႏွစ္ၿမိဳ႕ကို အလံုးေရ ၃၀၀၊ ၄၀၀ ၀န္းက်င္ ပို႔ထားပါတယ္။ ေရာင္းအားကိုေတာ့ ဆက္လက္ေစာင့္ၾကည့္ၿပီး လုပ္ေဆာင္သြားရမွာျဖစ္ပါတယ္” ဟု မိုဘိုင္းဖုန္း ဟန္းဆက္အေရာင္းဆိုင္မွ တာ၀န္ရွိသူတစ္ဦးကေျပာျပသည္။ လက္ရွိအခ်ိန္ထိတြင္ ေက်းလက္ေဒသမ်ားသို႔ အရစ္က်စနစ္ျဖင့္ မိုဘိုင္းဖုန္းလိုင္းမ်ား ေရာင္းခ်ေပးရာတြင္ ေရာင္းခ်မႈႏႈန္းမွာ သိသိသာသာ အရွိန္အဟုန္ျမင့္မားလာျခင္း မရွိေသးေၾကာင္း သိရသည္။

ေရးသားသူ -မိုးသူ http://myanmarinternetjournal.com/mobile/mobile-news/5484--gsm-

တစ္ခါသံုး Prepaid ကတ္မ်ားတြင္ ေငြထပ္မံျဖည့္ေပါင္းႏိုင္ေသာ္လည္း ဂ႐ုျပဳသင့္ဟုဆို

Tuesday, 23 October 2012 20:26

ေစ်းကြက္အတြင္းတြင္ ေရာင္းခ်ေပးလ်က္ရွိေသာ တစ္ခါသံုး One Time Prepaid ကတ္မ်ားတြင္ ေငြထပ္မံျဖည့္ေပါင္း အသံုးျပဳႏိုင္ေသာ္လည္း ယင္းကဲ့သို႔ ျဖည့္သြင္းျခင္းအား ဂ႐ုစိုက္ျပဳလုပ္သင့္ေၾကာင္း သိရသည္။ ျပည္တြင္းသို႔ အလည္အပတ္ လာေရာက္လ်က္ရွိေသာ ျပည္ပႏိုင္ငံသားမ်ားႏွင့္ အခ်ိန္ပိုင္းအေနျဖင့္ ဖုန္းငွားရမ္းလိုသူမ်ား

အသံုးျပဳႏိုင္ေစရန္အတြက္ တစ္ခါသံုး ဂ်ီအက္စ္အမ္ကတ္မ်ားအား ေရာင္းခ်ေပးလ်က္ရွိၿပီး အဆိုပါ တစ္ခါသံုးကတ္မ်ားအတြင္း ေငြထပ္မံျဖည့္ေပါင္းအသံုးျပဳႏိုင္ေၾကာင္း သိရသည္။ ယင္းႏွင့္ပတ္သက္၍ အဆိုပါ တစ္ခါသံုးကတ္မ်ား ေရာင္းခ်ေပးလ်က္ရွိေသာ မိုဘိုင္းဖုန္း အေရာင္းဆိုင္တစ္ခုမွ ေျပာျပရာတြင္ “တစ္ခါသံုး ဂ်ီအက္စ္အမ္ကတ္ေတြမွာ ေငြထပ္ေပါင္းၿပီး ျဖည့္လို႔ရတာ ေတြ႕ရပါတယ္။ ေငြထပ္ေပါင္းၿပီး ျဖည့္တဲ့ေနရာမွာေတာ့ ျပည္တြင္းသံုး Top Up ကတ္ေတြကို ျဖည့္လုိ႔မရပါဘူး။ တစ္ခါသံုးကတ္ေတြထဲကို ျဖည့္တဲ့အခါမွာ FEC Top Up ကတ္ေတြကိုပဲ ျဖည့္လို႔ရပါတယ္။ တစ္ခါသံုးလိုင္းကတ္က FEC 20 ပါ။ ေနာက္ထပ္ ထပ္ျဖည့္မယ္ဆိုရင္ FEC 10 တန္၊ FEC 20 တန္ကတ္ေတြကို ထပ္ျဖည့္လုိ႔ရပါတယ္။ ဒီလိုေငြျဖည့္ႏိုင္တဲ့အတြက္ အသံုးျပဳတဲ့သူေတြအေနနဲ႔လည္း အဆင္ေျပပါတယ္။ ဘာေၾကာင့္လဲဆုိေတာ့ ဖုန္းလိုင္းကတ္မွာ FEC 20 ဖိုးပါ၀င္ပါတယ္။ ဒါေပမဲ့ ဒါက ဖုန္းေျပာႏႈန္း မ်ားသြားတဲ့အခါမွာ တစ္ခါတေလ တစ္ပတ္ေလာက္နဲ႔ ကုန္သြားတာမ်ိဳးလည္း ရွိပါတယ္။ အခ်ိဳ႕ေတြဆို ႏွစ္ရက္သံုးရက္ေလာက္နဲ႔ ကုန္သြားၿပီး ေနာက္ထပ္ကတ္အသစ္၊ နံပါတ္အသစ္ကို ထပ္ၿပီး ၀ယ္သံုးရတာမ်ိဳး ရွိပါတယ္။ ခုလိုမ်ိဳး ေငြထပ္ျဖည့္လို႔ရေတာ့ ကတ္ထဲမွာ ေငြကုန္ခါနီးၿပီဆိုရင္ေတာင္ ကတ္အသစ္၊ နံပါတ္အသစ္ကို ထပ္အသံုးျပဳဖုိ႔မလိုအပ္ဘဲ ပိုက္ဆံထပ္ျဖည့္ၿပီး အသံုးျပဳလို႔ရတဲ့အတြက္ အဆင္ေျပပါတယ္။ ဒါေပမဲ့ ကတ္ရဲ႕သက္တမ္းကုန္ရင္ေတာ့ ပိတ္သြားမွာပါ” ဟုေျပာျပခဲ့သည္။ ထုိသို႔ ေငြထပ္ေပါင္းျဖည့္စြက္ျခင္းမွာ တစ္ခါသံုးကတ္အတြက္ သတ္မွတ္ေပးထားေသာ သက္တမ္း ၁ လအတြင္းတြင္သာ ျဖည့္သြင္းႏုိင္မည္ျဖစ္ၿပီး အဆိုပါ တစ္ခါသံုးကတ္မ်ားမွာ သတ္မွတ္ခ်ိန္ ၁ လျပည့္ပါက ဖုန္းအတြင္း၌ ေငြလက္က်န္ရွိေနသည့္တိုင္ လိုင္းပိတ္သြားမည္ျဖစ္ေၾကာင္း သိရသည္။ ယင္းကဲ့သို႔ ေငြထပ္ေပါင္း ျဖည့္သြင္းရာတြင္လည္း ေငြအနည္းငယ္ကိုသာ စမ္းသပ္ျဖည့္သြင္းသင့္ၿပီး တစ္ခ်ိန္တည္း ေငြအေျမာက္အျမား ျဖည့္သြင္းျခင္း မျပဳလုပ္သင့္ေၾကာင္း သိရသည္။ အဆိုပါ ေငြထပ္မံျဖည့္ သြင္းျခင္းႏွင့္ပတ္သက္၍ ျမန္မာ့ဆက္သြယ္ေရးသို႔ ဆက္သြယ္ေမးျမန္းရာတြင္ ေငြျဖည့္သြင္းႏိုင္ျခင္း ကိစၥရပ္အတြက္ အတည္ျပဳေျပာၾကားျခင္း မရွိခဲ့ေပ။

ေရးသားသူ -ကိုသက္
source http://myanmarinternetjournal.com/mobile/mobile-news/5473--prepaid-

Make a bootable USB installer for Windows XP, Vista, 7 with WinToFlash

Making a bootable USB flash drive for Windows Vista and Windows 7 isn't all that tricky, but it's always nice to find an app that simplifies things. Not only does WinToFlash make the process about as easy as it can get, but it can also create Windows XP, Server 2003, and Server 2008 installers.

The default options make it easy to roll a silent Windows install, or you can flip the custom switch and specify the exact setup parameters you want to use.

The handy app also has one more trick up its sleeve: moving Windows Preinstall environments. PE discs can be extremely handy for troubleshooting and repairs, and being able to painlessly zap them over to a USB flash drive means not having to burn a new copy every time someone's haggard old optical drive decides to chew up your CD.

WinToFlash is a free download and is totally portable. It's an excellent tool to add to your USB-related utilities.

Monday, October 29, 2012

How to - Install Recovery on Huawei Ascend P1 - U9200 B113 and B115

http://johnnyparanoia.blogspot.co.uk/search/label/Huawei%20Ascend%20P1%20U9200

How to - Install Recovery on Huawei Ascend P1 - U9200 B113 and B115

Huawei U9200 AKA Ascend P1


WARNING: Rooting your phone invalidates your warranty.

Try this at your own risk, I am NOT responsible if you brick your phone.

This guide is for phones with firmware B113 and B115 (may work on others but not tested as far as I'm aware)

Step 1 - Download either the full pack here - b113_b115-root_u9200---__[Nixing] (Thanks to Nixing at XDA for this download. Password: ccc333) or just the tools here - b113 b115 root u9200[Nixing] Tools Only and extract to your desktop.

Step 2 - Enable USB debugging on your phone - Settings -> Developer options -> USB debugging and plug it into your PC

Step 3 - Run hwadb.exe and let it finish.

Step 4 - Run ubl.exe and wait for it to finish.

Step 5 - Disconnect your phone from your PC and Reboot.

Step 6 - Check to see if Superuser has been installed on your phone.

Step 7 - If you find Superuser in your menu, Congratulations your phone is rooted :)

Step 8 - You will now need to install a custom recovery to make use of your newly rooted phone so head over here -

How to - Install Recovery on Huawei Ascend P1 - U9200 B113 and B115

for instructions

Enjoy.

A Big thanks goes to Nixing at XDA for working out this method for the B113 and B115 versions (Original Thread here)and again to Genokolar for creating the tools for this :)


How to Install Root and Recovery on Huawei U9200 - Ascend P1

  http://johnnyparanoia.blogspot.co.uk/search/label/Huawei%20Ascend%20P1%20U9200

How to Install Root and Recovery on Huawei U9200 - Ascend P1

Huawei U9200 AKA Ascend P1


Note: This is no longer experimental :) This method has been tested by members of XDA here and has been developed with the help of my friend Kahraman via Madmodder aka 123hero123 at XDA :)


This method only works on firmware versions up to B110, if you have firmware versions B113 or B115 then head over here -

How to - Root Huawei Ascend P1 - U9200 B113 and B115 

and 

How to - Install Recovery on Huawei Ascend P1 - U9200 B113 and B115


Step 1 - Download Onekey_ROM_Ascendp1 Installer here and extract to your hard drives root (May not be necessary but in my experience can prevent problems).
(Please note this tool is not my work. All credit goes to Genokolar who is a brilliant Chinese developer)

Step 2 - Make sure you have the correct drivers for your handset installed, you can get them here if needed - Huawei USB Drivers

Step 3 – Enable USB Debugging, Settings>Developers Options

Step 4 - Run Onekey_ROM_Ascendp1.exe and press any key.

English Translation by me :)
Step 5 – Next select Option 1 or 2.
Option 1 – Flashes and wipes all the user data
Option 2 – Flashes without wiping the user data which can cause problems such as freezing and boot loops.

And English
(If your phone isn't connected properly, the correct drivers are not installed or USB debugging is not switched on. You will see this screen)

Step 6 – Wait while the recovery image is installed, pressing any key when prompted.


Step 7 – Once the program has finished flashing your phone, you will see the screen below. Now use the recovery menu to flash update.zip from the SD Card and it will flash a rooted version of U9200 V100R001CHNC00B109 (Android 4.0)
Step 8 – Now you will need to flash gapps ICS pack from here or my mirror here, if you want to use Google Play.
Step 9 – Optionally there is a rooted version of U9200-1V100R001CHNC00B113 by lesong
available here or here (my mirror). 
 
Note: You will need to reflash the gapps package if you upgrade to this rom.
Also Note: The recovery flashed with this is in Chinese, its ClockworkMod based so should be easy enough to navigate around until an English language one is available.
Enjoy :)


Addendum: I'm going to release an English translation of Genokolar's Onekey tool shortly and will post it here when it is ready :)

How to - Restore stock Firmware on Huawei Ascend P1 - U9200

How to - Restore stock Firmware on Huawei Ascend P1 - U9200

http://johnnyparanoia.blogspot.co.uk/search/label/Huawei%20Ascend%20P1%20U9200

Huawei Ascend P1 - U9200


WARNING - This will completely reset your phone and erase all data, custom rom and any custom recovery partition you have installed such as ClockWorkMod and replace it with Huawei Stock recovery etc. It will also remove any rooting on the phone and restore it to its unrooted state.


Method 1 – Forced Update


Step 1 - BACKUP everything on your phone.


Step 2 - Download the stock firmware


(These are the only ones I have available at the moment so you might need to pick the closest match for yours)

* - This may or may not be the correct country, I've had to guess with some of the firmwares so if not it will probably be close or a general/normal version.


Step 3 – Download all parts of the firmware into the same folder.


Step 4 - Open one of the downloaded .rar files in WinRAR or other archive manager.


Step 5 - Select the 'dload' folder inside the main folder and drag it onto your desktop.


Step 6 - Open the 'dload' folder on your desktop and check that the file 'update.app' is inside.


Step 7 - Copy the whole 'dload' folder accross to the root of your phones SD card (you may want to use a blank SD for this)


Step 8 - Turn your phone off then press and hold the volume up and volume down keys together and then press the power key.


Step 9 - The install process should start automatically so just wait until its finished.


Step 10 - Your phone will reboot automatically after the firmware has finished installing and will take some time to load, this is normal so just leave it to do its thing.
Step 11 – Check that the update has worked by checking the Firmware version by navigating to - Setting->About phone->Build number


Note: The [Firmware Version] should match the last 7 characters of the firmware you downloaded eg C00B213.
Method 2 – Normal Update


Step 1 - BACKUP everything on your phone, I cannot stress this enough :)


Step 2 - Download the stock firmware


(These are the only ones I have available at the moment so you might need to pick the closest match for yours)

* - This may or may not be the correct country, I've had to guess with some of the firmwares so if not it will probably be close or a general/normal version.


Step 3 – Download all parts of the firmware into the same folder.


Step 4 - Open one of the downloaded .rar files in WinRAR or other archive manager.


Step 5 - Select the 'dload' folder inside the main folder and drag it onto your desktop.


Step 6 - Open the 'dload' folder on your desktop and check that the file 'update.app' is inside.


Step 7 - Copy the whole 'dload' folder accross to the root of your phones SD card (you may want to use a blank SD for this)

Step 8 – If your phone is on, switch it off and then back on again. Otherwise switch on your phone and wait for it to boot up fully. Navigate to Settings->Storage->Software Upgrade->SD card Upgrade->Confirm->Upgrade
You should then see the following - 


Step 9 – Check that the update has worked by checking the Firmware version by navigating to - Setting->About phone->Build number


Note: The [Firmware Version] should match the last 7 characters of the firmware you downloaded eg C00B213.

Done, you should now have a phone thats back to factory fresh :)

Monday, October 22, 2012

Huawei C8812 firmware ျပန္တင္ျခင္း

အဆင္႕ (၁) သင္႕ ဖုန္း ကို back up ျပဳလုပ္ပါ။
အဆင္႔ (၂) latest version
C8812,Android 4.0,V100R001C92B939
Huawei C8812 firmware (a)
huawei Ascend C8812 Firmware (b)
အထက္ပါ လင္႕မ်ား မွ ေဒါင္းပါ။
အဆင္႕(၃) ဇစ္ဖိုင္ ကို ျဖည္ပါ။
dload file ကို SD card ထဲထည့္ ၿပီး ဖုန္းကို volume +,-,power bottom ကိုတြဲႏွိပ္ ပါ ။
ROM ကုိ အင္စေတာ လုပ္သြားပါလိမ္႕မယ္။ ဖုန္း ရီစတတ္က်သြားျပီးေနာက္ firmware တင္ျပီး C8812 ကို ရ ပါျပီ။

Saturday, October 20, 2012

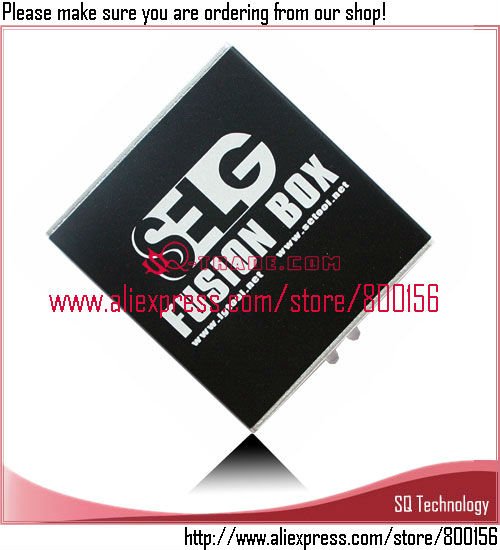
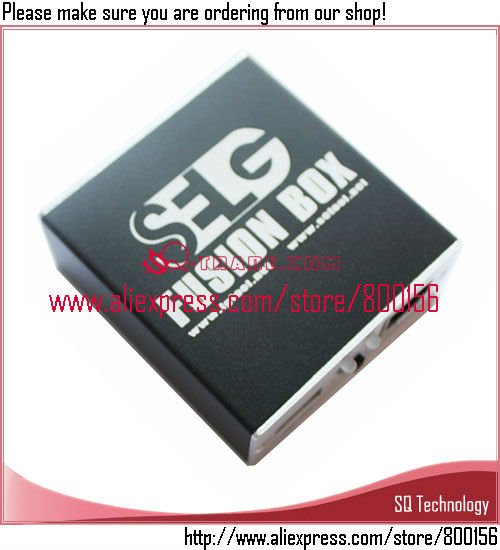
SELG Fusion Box SE Tool without Smart Card and Cables

Item specifics

Place of Origin:
Guangdong China (Mainland)
Brand Name:
SE Tool
Model Number:
SE Tool
Original:
New

Product Description

SELG Fusion Box SE Tool without Smart Card and Cables 

SE Tool 3 Box+Test Card(full activation) with 10 Cables Free Shipping by DHL EMS

Specifications:
  • Single card reader slot (card can be inserted without box opening). It supports Schlumberger, JCOP and TOP cards.
  • Single output port (RJ45) controlled by switch.
Modes:
  • for SE Tool Mode
  • for LG Tool Mode (Unitool mode)
Packing Contains:
  1pcs SE Tool Box


SELG Fusion Box SE Tool without Smart Card and Cables free shipping

SELG Fusion Box SE Tool without Smart Card and Cables free shippingSELG Fusion Box SE Tool without Smart Card and Cables free shippingSELG Fusion Box SE Tool without Smart Card and Cables free shipping

Packaging Details

Unit Type:
piece
Package Weight:
0.2kg (0.441lb.)
Package Size:
15cm x 12cm x 10cm (5.91in x 4.72in x 3.94in)